To Continue Using Webassign Verify Payment by Purchasing Access or Entering an Access Code
Webassign Access Code Purchase
Related Search
Purchase Access Online - WebAssign
great www.webassign.net
Purchase access to your course materials online. WebAssign Grace Period Start using WebAssign without payment during the grace period, which starts when the course is available and lasts up to 14 days depending on the length of the course.; Purchase Cengage Unlimited Get access to your course materials, eBooks, and study tools with Cengage Unlimited or Cengage Unlimited eTextbooks.
Top Results For Webassign Access Code Purchase
Updated 1 hour ago
Access Codes - WebAssign
new webassign.com
Purchase an access code online after logging into your WebAssign account. This method is the easiest because WebAssign automatically provides a correct code for each course. A credit card or PayPal account is needed for this option. Some institutions, particularly secondary schools, provide access code cards to students.FAQ‧Get on The Path to Success
I will not pay to access my assignments! - MasterMaq's Blog
trend blog.mastermaq.ca
According to our records you have not entered an access code for this class. The grace period will end Monday, January 15, 2007 at 12:00 AM GMT. After that date you will no longer be able to see your WebAssign assignments or grades. After you enter an access code, you will again have access to your assignments and grades.
WebAssign
new www.webassign.net
WebAssign. New in WebAssign. Stay updated on the latest WebAssign improvements and enhance your students' learning experience with new textbooks, features, and content. Get the Details. Your Guide to Virtual Exams. Access best practices and settings to deliver secure tests in your course with WebAssign. Learn More.
Improved Access Through Affordability - WebAssign
hot webassign.com
Please contact us for information about using WebAssign in a commercial or government setting. NOTE: If you are a bookstore interested in purchasing Access Code Cards for a class that is not using a Cengage textbook, please submit our Bookstore Order Form for a price quote. See Billing Support for more details. Please note that all prices are ...
Amazon.com: access code for webassign calculus
best www.amazon.com
1-16 of 154 results for "access code for webassign calculus" Enhanced WebAssign Printed Access Card for Calculus, Multi-Term Courses, Life of Edition, 1st Edition. by WebAssign | Aug ... $38.47 $ 38. 47 to rent $128.33 to buy. Get it as soon as Fri, Jul 16. FREE Shipping by Amazon. More Buying Choices $37.11 (80 used & new offers) eTextbook ...
Calculus:Early...-Webassign Access Printed Access Code ...
tip www.amazon.com
Ships from and sold by -Bookworm-. Calculus: Early Transcendentals. by James Stewart Hardcover. $131.00. In Stock. Ships from and sold by Tome Dealers. $3.99 shipping. Student Solutions Manual for Stewart's Single Variable Calculus: Early Transcendentals, 8th (James Stewart Calculus) by James Stewart Paperback.
Video result for webassign access code purchase

How to Enter an Access Code

How to Purchase and Redeem an Access Code

Access Code

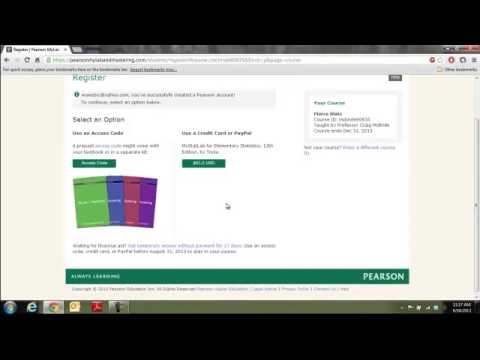
Purchasing your My Pearson Access Code

Navigate 2: Premier Access The First Day of Class for...

MindTap - Registering Your Access Code on CengageBrain

College Textbook Online Access Codes Are A SCAM!...

Accessing Your Online Textbook in Cengage Unlimited...

pearson access purchase tutorial

Cengage MindTap Digital Platform Purchase Instructions...

Register for Achieve using an access code

Part 6-Buy a VP Access Code

For Instructors - How to Request Financial Aid Access...

How to Access eBook Resources

Cengage Unlimited: Activating a Printed Access Code

How to Register for McGraw Hill Connect

McGraw Hill Textbook - how to access online textbook

How I Protect My VBA Coded Products For Microsoft...

Protect Microsoft Access App To Sell

Access codes force students to pay to do homework

MyLab - Convert Temporary Access Code to Permanent Code

Pearson Places Digital Activation Code Guide
![[2014] Free MyMathLab Access Code](https://cdn.statically.io/img/img.youtube.com/vi/MjW6ApwhHgE/hqdefault.jpg)
[2014] Free MyMathLab Access Code

Concur Purchase Request & PO Matching

How To Purchase an Access Code for 10-Key Mastery

How to Order Books and Access eBooks

EA Access Purchase Options a Joke

How to access your Cengage Hosted MindTap Course -...

🔥HOW TO PURCHASE UC IN BATTLEGROUNDS MOBILE INDIA...

Amazon Digital Code Not Showing Up - Amazon How To...

How to Redeem Steam Codes for Jackbox Games

How to block the purchase order in sap

MS Office 2016 Pro - $35 - How to Buy, Download, &...

A secret promo code on ps4

Create Purchase Order | Sales Order | Use Master...
Pearson MyLab Temporary Access Code

How to change your Access code on your Pager Beeper...

How to Buy Load via GCash Access Code *143#

SSN Validation

RULINGS - Accesscode Talker MUST KNOWS, Everyone will...

Van Gogh
Webassign Access Code Card-One Term Version / Edition 1 by ...
best www.barnesandnoble.com
The Webassign access codes have a prefix that pertains to the textbook that you need access for. This product posting does not display the prefix, so it is a random chance that you can purchase the access code with the correct prefix that you need. On the shipping slip/receipt, it gave me the option to return via mail, or in-store; I opted for ...
Billing Support - WebAssign
hot webassign.com
WebAssign is free for class instructors and you do not need an access code to use WebAssign. Sign up for your free faculty account. Students. For most classes that use WebAssign, each student will need to purchase an access code. Request a Receipt. We can provide a receipt for your WebAssign purchase upon request.
Loading
best www.webassign.net
WebAssign. Student. Help. With engaging content to challenge you and build your confidence, WebAssign gives you complete control over your coursework. If this is your first time using WebAssign, learn how to sign in, enroll in your course, and complete assignments. WebAssign software releases include improvements and bug fixes.
Where can I buy WebAssign access code? | Art Blog ...
tip firstlawcomic.com
You can purchase access online after signing in to WebAssign. Note Your WebAssign and Cengage accounts must be linked before you can purchase access. Your purchase of a new textbook might include a WebAssign access code card for the course. You can purchase WebAssign access code cards at many campus bookstores.
Trending Videos

Registering and Purchasing WebAssign Online
3:57

Registering for Webassign
3:41

WebAssign Sign-In Instructions
2:44

How to sign up for WebAssign
3:15

WebAssign through UCSDTritonEd
2:43
Blogs

5 Steps Ways to Remove Microsoft Account Data from Windows 10
Are you looking forward to knowing the5 steps ways to remove Microsoft Account data from Windows 10? If yes, you should find Microsoft Account is an email address and secret phrase which could be utilized to sign in to your Windows 10 PC. On the off chance that you presently don't have any desire to utilize a Microsoft account with Windows. In this instructional exercise, we'll show you5 steps ways to remove Microsoft Account data from Windows 10. 5 steps ways to remove Microsoft Account data from Windows 10,these techniques eliminate the Microsoft account locally from your Windows 10 PC. On the off chance that you need to close/erase your online Microsoft account, if it's not too much trouble, visit Microsoft's record shutting site page. Microsoft Account Login from Control Panel Press Windows key + X on your console to show the WinX menu and select Control Panel From the Control Panel, click the View by drop-down bolt and select Large symbols. Snap User Accounts Snap the "Deal with another record" interface. This screen shows every one of the records at present on your PC. Snap-on the Microsoft account you need to erase. From the rundown of alternatives, click on the Delete the record choice. The following window inquires as to whether you need to keep the documents identifying with this record. If you click on Keep Files, all your records are kept unblemished, and you can choose to erase the profile organizer whenever. Microsoft Account Login from Netplwiz Press Windows key + R on your console to open the Run box. Type netplwiz and press Enter It will open the User Accounts window. On the off chance that you have auto-login empowered, you need to check the "Clients should enter a client name and secret key to utilize this PC" box. Select your Microsoft account from the rundown and snap-on Remove You'll be incited to affirm, and if you truly need to proceed, click Yes, and the Microsoft account login will be taken out in a matter of moments. Microsoft Account Login from Settings App Are you sure5 steps ways to remove Microsoft Account data from Windows 10for the App setting: Above all else, open the Settings application by tapping the Start button and choosing the Settings choice. You can likewise utilize the "Windows + I" hotkey. Before opening the Settings page, click the Accounts choice using5 steps ways to remove Microsoft Account data from Windows 10.From that point forward, select Family and different clients alternative accessible on the left half of Accounts menu. Snap on the Microsoft account that you wish to erase, and afterward, from the accessible alternatives that open underneath, click on the Remove button. When the affirmation discourse box shows up, click on the "Erase record and information" button for erasing the presently chosen Microsoft account. Microsoft Account in Windows 10: 5 steps ways to remove Microsoft Account data from Windows 10hotmail.com or outlook.com are free records that you can use to buy in Microsoft administrations like email, OneDrive, Skype, Xbox, and so on. During the establishment of Windows 10, you will be offered to utilize your Microsoft account as the client represent login to the PC. Before you begin eliminating the Microsoft account in Windows 10, you should know5 steps ways to remove Microsoft Account data from Windows 10and sign in to the PC utilizing another manager account other than the Microsoft account you need to eliminate. At the point when you have affirmed the above necessity, So, you should know5 steps ways to remove Microsoft Account data from Windows 10; the expulsion of a Microsoft Account in Windows 10 should be possible in three basic strides underneath: Stage 1.Raise the Windows Settings window by squeezing the Windows + I key. On the interface, click on Accounts. Stage 2.On the left sheet, click on "Family and others" as pointed in the bolt beneath. You will see all records on the PC. Stage 3.On the correct sheet, discover the Microsoft account name that you need to eliminate. You can tap on the name and see the email address to ensure it is the correct record you need to eliminate. At the point when you are certain, click on the Remove button. Open your Windows Settings You can press the Windows key and I all the while, or click the Windows Start menu and snap the stuff symbol. Snap Accounts. This symbol resembles an outline of an individual and says, "Your records, email, sync, work, family." Snap Family and different clients. You'll see this in the upward menu on the left half of the window. If you're utilizing a work or school PC, you may need to choose Other clients or Other individuals. Snap the individual you need to erase. You'll see more choices show up for that client. On the off chance that you see "Neighborhood account" beneath the client name, this record exists on the current PC. See more:Ways to Log In to Spotify Quickly on Mobile, Web, and Laptop
Read More

Step By Step To Remove Login Password On Windows 10
You can evacuate your account secret word on Windows 10, whether you're employing a Microsoft account or neighborhood account, and in this direction, you'll learn how to perform this task. Although utilizing Windows 10 with a secret word is continuously prescribed to keep your gadget and records secure and secure from prying eyes, in some cases, depending on the circumstance, a watchword may fair include additional steps to the login process. If you have got a computer without critical records, and you're not concern approximately security, Windows 10 incorporates different ways to evacuate the account password. In this blog, you may learn the steps to sign in naturally (or expel the login secret word) from a Windows 10 gadget, whether you employ a neighborhood or Microsoft account. Disable password login on Windows 10 Remove password login on Windows 10 Remove login password using Command Prompt Disable password login on Windows 10 On the off chance that you employ a Microsoft account, you cannot evacuate the watchword totally, since your accreditations are connected to your online account, but you'll arrange your gadget to sign inconsequently to imitate an account without a password. To bypass the watchword login on Windows 10, utilize these steps: • Open Begin on Windows 10. • Search for netplwiz and tap the best result to open Control Panel. • Under the “Users for this computer” segment, select the account you need to expel the password. • Clear the Client must enter a client title and watchword to utilize this computer option. netplwiz settings on Windows 10 • Click the Apply button. • Confirm the Microsoft account data to sign in automatically. • Automatic sign-in on Windows 10 • Click the Alright button again. Once you total the steps, the gadget will proceed to have a secret word, but it'll sign in naturally on each begin. Remove password login on Windows 10 Then again, in case you utilize a Microsoft account, you'll expel the password entirely, but you've got to switch to a nearby account. Warning: Typically an inviting update that expelling your account secret word will make the gadget more powerless to unauthorized get to locally and remotely. Remove password for Microsoft account To switch to an account and delete the password, use these steps: • Open Settings. • Click on Accounts. • Click on Your info. • Click the Sign in with a neighborhood account instep option. • Sign in with a neighborhood account option • Sign in with a neighborhood account option • Click the Following button. • Confirm your current password. • Click the Another button. • Create a username for the account. • Leave the “Password” and “Reenter password” areas clear to evacuate the secret word entirely. • Remove secret word from Windows 10 • Remove secret word from Windows 10 • Click the Another button. • Click the Sign-out and wrap up button. Remove password for local account To expel Windows 10 secret word from a nearby account, utilize these steps: • Open Settings. • Click on Accounts. • Click on Sign-in options. • Under the “Manage how you sign in to your device” segment, select the Secret word option. • Click the Alter button. • Remove watchword from nearby account • Remove watchword from neighborhood account • Confirm your current account password. • Click the Another button. • Leave the “Password” and “Reenter password” areas clear to expel the secret word entirely. • Windows 10 expel watchword neighborhood account • Windows 10 expel watchword neighborhood account • Click the Following button. • Click the Wrap-up button. Once you total the steps, a watchword will now not be required to get to the Windows 10 desktop. If you need to evacuate a secret word fair since it is a bother, it is best to switch to a speedier and more secure strategy of confirmation, for illustration, making a Stick or setting up a unique finger impression peruser that as it were requires a straightforward finger swipe. Remove login password using Command Prompt To evacuate the account secret word with Command Provoke, utilize these steps: • Open Start on Windows 10. • Look for Command Prompt, right-click the beat result, and select the Run as a chief option. • Sort the taking after the command to see all the accounts and press Enter: net client • Sort the taking after the command to modify the account secret word and press Enter: net client USERNAME * Within the command, make past any doubt to modify USERNAME with the standard or chairman account title basically ought to overhaul. • Press Enter twice to empty the password. After you total the steps, the account will not incorporate a security watchword to sign in. On the off chance that you would like to set a modern secret word, you'll utilize the same over steps, but on step No. 5, make beyond any doubt to indicate a new password. You can as evacuate a password with Command Incite for a neighborhood account. On the off chance that you have got a Microsoft account, you may get to utilize the online settings or the alternative accessible through the Accounts settings page (see above). We may gain commission for buys utilizing our joins to assist keep advertising the free substance. Security arrangement info. All substance on this location is given with no guarantees, express or suggested. Utilize any data at your possess hazard. Continuously reinforcement of your gadget and records some time recently making any changes. Security approach info.
Read More

Tips to Login to Multiple Pinterest Accounts at Once
Do you have over than one Pinterest account? Then you've probably been looking forward to the day when Pinterest would allow you to log in to various examples at once. That day has actually appeared! WHY WOULD YOU WANT TO LOG IN TO MULTIPLE ACCOUNTS? Is it even required to have multiple Pinterest accounts? You'd be astounded! Social Media Managers and Strategists - we usually have several clients and need to go into their accounts to monitor activity, enhance performance, run sponsored posts, and collect data for reporting. Bloggers — many bloggers have multiple websites, some of which may or may not have content overlap. VAs - VAs handle Pinterest accounts for the last several customers and requires the same level of exposure as social media managers. HOW DID I FIND OUT ABOUT THIS FEATURE? To manage my Pinterest account, I use Tailwind, a service for scheduling Pinterest content. Because I can manage exactly What I wanted in Tailwind, it's easy to avoid surfing the Pinterest platform. On the 25th of each month, I sometimes spend a few hours scheduling the majority of my pins for the following month. So I don't need to go to Pinterest, and I also don't need to log in to Tailwind very often. Why is Tailwind the Pinterest tool of choice? Talwind's efficiency is something I want to. In just a few hours of work, I can schedule all of my pins for the whole week. It has saved me so much time that I can now focus on other crucial aspects of my business, such as keyword research and developing effective possible content. I utilize Tailwind's set of rational tools to manage my client accounts and keep records of their data as a social media manager and strategist. I personally like the Board Insights functionality, which assists me in gauging the health of any group boards I've joined through my own either through client accounts. The multiple account feature on Pinterest is equivalent to the feature on Instagram. You can switch accounts from a dropdown menu of accounts you've logged in under. There is also an option to add another account to the list at the bottom. For anyone who oversees various Pinterest accounts, this is a wonderful experience! This is what you'll get: How to log in to multiple Pinterest accounts at one time: Click the down arrow to the right of your Pinterest username upon that home page. To add your account, click the "add account" button. With your password and log in info, log in to the new account. You will be led to your newly logged in account, which again will appear in the drop down menu's account list. How to manage numerous Pinterest accounts: From the home page, click the down arrow to the right of your Pinterest username. Or click the 3 dots next to the notification bell icon and select “switch accounts” From the drop down menu, choose the account you’d like to switch to. Click the down arrow to the right of your Pinterest username on the home page. Alternately, select "switch accounts" out from three dots under to the notification bell icon. Select the account you want to switch to from the drop-down menu. To log into each of the four accounts you handle, consider incorporating various browsers or devices. On the same device, you may log into accounts 1-4 utilizing Google Chrome and accounts 5-8 with Microsoft Edge. This capability allows you to log in to both business and individual accounts. This functionality appeared on an entirely new personal account I created for the purpose of testing. USING MULTIPLE ACCOUNTS TO YOUR ADVANTAGE Remember how I said I like to log in to Pinterest every day to get a genuine sense of what is it like to be a pinner? Also, try using a variety of mobile and desktop browsers to log in with both corporate and personal accounts. This will allow you to see how your material displays on the platform in diverse positions. Take a look at this pin, which changes appearance depending on the type of account watching it and the browser it's viewed in.
Read More

How to Enable Two-Factor Authentication on Twitter
If your login credentials fall into the wrong hands, Twitter can be a strong soapbox for you, your brand, or your business – and an even more powerful weapon. While Twitter is unquestionably one of the finest social networking apps, you should protect your account by setting Twitter's two-factor authentication (2FA) options on both your best iPhone and best Mac and solve the Twitter-two factor authentication problem: Here's how to do it. There are a few ways accessible to you to keep your Twitter account from being hacked by entrepreneurial hoodlums or hackers. How to set up two-factor authentication Twitter App: How to enable 2FA for Twitter on iPhone and iPad via text message 1. From your Home screen, open the Twitter app. 2. On the upper left of your screen, tap the profile bubble. 3. Select Privacy and Settings from the drop-down menu. 4. Select Security and Account Access from the drop-down menu. 5. Select Security. 6. Select Two-factor authentication from the drop-down menu. 7. Toggle the Text Message On/Off switch on or off. 8. Select Get Started from the drop-down menu. 9. Type in your Twitter username and password. 10. Press the Verify button. 11. Press the Send Code button. 12. Enter the text message confirmation code that was sent to you. 13. Press the Next button. 14. Press the "I Got It" button. Remember to save the backup code somewhere safe in case you need it in the future. When you sign in to Twitter now, you'll need to input the confirmation code issued to you by text message. However, the procedure for setting them up for Twitter may differ. From your Home screen, open the Twitter app. 1. Go to the upper left corner of your screen and tap the profile bubble. 2. Select Privacy and Settings from the drop-down menu. 3. Select Security and Account Access from the drop-down menu. 4. Select Security. 5. Select Two-factor authentication from the drop-down menu. Toggle the On/Off switch for the Authentication app. 6. Press the Start button. 7. Verify your password by entering it. 8. Now, open the Link app. 9. To open your authentication app, tap Open. 10. Allow your authentication app to add a new token by tapping YES. 11. To return to the Twitter app, tap Twitter in the top left corner. 12. Enter your login app's confirmation code. 13. Press the Verify button. You'll have to provide the confirmation code from your authentication app every time you sign in to Twitter now. How to enable 2FA for Twitter on your computer through text message When you log in to your Twitter account via an app or a web browser, you can have a code sent to the phone number that you must enter before you can access your account. It's simple to set up: 1. If you haven't already, go to Twitter on your computer and log in. 2. In the upper right corner, next to Tweet, click the profile bubble. 3. Select More from the left-hand sidebar. 4. Select Privacy and Settings from the drop-down menu. 5. Select Security and Account Access from the drop-down menu. 6. Go to the Security tab. 7. Select Two-Factor Authentication twitter app button from the drop-down menu. 8. Select Text Message from the drop-down menu. 9. Select Get Started from the drop-down menu. 10. Type your password in the box. 11. Click the Verify button. 12. Enter the code and click Send. 13. Enter the SMS message's confirmation code. 14. Select Next. 15. Select I've Got It. Remember to save the backup code somewhere safe in case you need it in the future. You'll have to input the confirmation code issued to you through text message every time you sign in to Twitter now. How to enable 2FA for Twitter on your computer using an authentication program There are a variety of authentication apps available, and the method for configuring them for Twitter may change slightly. I've used the Google Authenticator app to demonstrate how it works in this case. 1. If you haven't already, go to Twitter on your computer and log in. 2. In the upper right corner, next to Tweet, click the profile bubble. 3. In the left-hand sidebar, click More. 4. Select Privacy and Settings from the drop-down menu. 5. Select Security and Account Access from the drop-down menu. 6. Go to the Security tab. 7. Select Two-Factor Authentication twitter app button from the drop-down menu. 8. Select Authentication app from the drop-down menu. 9. Press the Start button. 10. Type your password in the box. 11. Click the Verify button. 12. On your phone, open the authenticator app. 13. Use the computer screen to scan the barcode. 14. Select Next. 15. Enter your authenticator app's confirmation code. 16. Click the Verify button. 17. Select I've Got It. To complete the login procedure, you'll need to open your authenticator app and enter the confirmation code every time you log in to Twitter. On the iPhone and iPad, How to create a temporary Twitter password You'll be able to create a temporary password once you've enabled the two-factor authentication twitter app by text message or an authentication app. When you sign into third-party apps and services, or when you utilize a device that isn't your own, you can use it. 1. From your Home screen, open the Twitter app. 2. On the upper left of your screen, tap the profile bubble. 3. Select Privacy and Settings from the drop-down menu. 4. Select Security and Account Access from the drop-down menu. 5. Select Security. 6. Select Two-factor authentication from the drop-down menu. 7. Select Temporary Password from the drop-down menu. It can be found at the bottom of the menu. 8. Select Generate a new password from the drop-down menu. A new temporary password will be generated immediately, and you can now use it to log in to your Twitter account. After one hour, the password will expire. How to turn off two-factor authentication on Twitter Tap your profile symbol in the top menu, then Settings and privacy. After that, tap Account, then Security. Select Two-factor authentication from the drop-down menu. Toggle the checkbox next to the two-factor authentication method you want to disable. This article will learn that how to enable and turn off two-factor authentication on Twitter. Verify your twitter login How to verify your Twitter login are discussed below: Go to Settings and privacy > Your account > Account information on the web. Go to Request Verification after you've entered your password. Tap Settings & Privacy > Account > Verification request on Android and iOS.
Read More

Tricks to Remember Seriously Secure Passwords
You can't use easy-to-remember passwords like your birthday or the name of your dog. You are not permitted to use passwords that are too short or too simple. Even if you memorize strong, seriously secure passwords like $6k9iwb3&IBwxMpa, you can't use it on multiple websites. Are you getting frustrated yet? Employ the services of a password manager to save your sanity. Establishing and remembering a unique, strong password for each website is a breeze using such a tool. Tricks Secure Passwords You're probably tired of hearing how crucial it is to follow specific steps when creating seriously secure passwords. But trust us when we say that remembering them is critical. We also recommend that you change them regularly and don't use the same one for several accounts. They have nothing to do with your personal information (birthday, favorite football team, pet, etc. This is all simple sense, and we'll keep reminding you. We understand how tough it is to remember so many distinct, complex passwords. As a result, we've come up with a few tiny tips to help you remember all of those difficult-to-guess passwords! 1. Consider a Sentence Consider a phrase or a term that means something to you and just you. It shouldn't be too short to be easily guessed, nor should it be too long to be forgotten. It's fantastic if it incorporates both upper and lower case letters. Symbols? It gets even better. "Beers in the local pub are €4", for example. Now, take the initial letter of each word and combine them to form "Itlptba€3," a decent password. If you're stuck on ideas, try using the title of your favorite music as an example. 2. Match Two Words Together Choose two words (again, preferable if they only mean something to you) and combine the letters to form a new word. If you selected "Beards" and "Lighters," your new password's base will be "BLeiagrhdtsrs." It doesn't contain any numbers or symbols. Still, you can simply improve it by using the further examples we'll provide below. 3. Make Numbers Out Of Vowels This is a trick that fraudsters are already aware of. Still, it could be useful as a supplement to another password strategy. Our password "BLeiagrhdtsrs" becomes "BL314grhdtsrs" in the preceding example. It would be ideal to use if a few symbols were added. 4. Get Rid Of The Vowels We can eliminate the vowels entirely instead of replacing them with numbers, as in the preceding case. The password would be "BLeiagrhdtsrs" if we used our made-up word "BLeiagrhdtsrs." To make it even more secure, add some extra numbers and symbols. 5. The Keyboard Mystery This one also entails the removal of something. First, choose an easy-to-remember sequence of numbers (a postal code, for example), so let's say we finish up with 28921. Look for the numbers on the keypad and replace them with the letters right beneath them: "2wsx8ik9ol2wsx1qaz." You may make it a little more complicated by substituting a symbol for one of the characters and changing some to the upper case. 6. Combine A Number And A Word Let's pretend we're using the word "Beards" and the number "28921" for this one. We obtain "B1e2a9r8d2s" if we put them together one letter and number at a time, in reverse order. All you need now is a symbol, and you're ready to go. 7. Begin With The Account As A Base Using the same password for many accounts and websites is a bad idea. Still, with a little effort, you can make your default password work for multiple accounts. If you want to sign up for Facebook, for example, you might add "FB" to the beginning or end of your password. You might also attempt a password that combines upper and lower case symbols and numbers until you find one you like. 8. Play With A Dice This approach is a little complex, but so can you if an 11-year-old girl can do it. Diceware is a system that uses dice and a list of words to generate entirely random, seriously secure passwords that are both strong and safe. You can see everything here and let us know what you think. 9. Style Sudoku Number Grab a pen and paper, and construct a 6x6 grid with random numbers in each block. Consider how you unlock your phone's screen with your finger, and then move your fingers over just made. The digits you just traced will serve as the foundation for your password, to which you can add letters and symbols. This could be the most effective method on the list. The identical action with your finger will give you a new code if you modify the numbers you've placed in the blocks. You'll have a limitless supply of passwords merely by remembering the movement and saving the innocent-looking piece of paper. Conclusions: Let's say you've followed all of the security guidelines to the letter. You've set up an antivirus program or a security package. A Virtual Private Network, or VPN, encrypts and protects your network communication. You've also sought the help of a password manager to manage your slew of seriously secure passwords. To lock down that password manager, you're still left with knowing one ridiculously safe master password.
Read More
Can I send you my experience related to Webassign Access Code Purchase?
That's great. We are welcome anything that helps to improve the user experience. If you have experienced with Webassign Access Code Purchase and have any tips, share it with us via email, we really appreciate it.
What if a login page collected by Loginask is not working?
Among pages recommended for Webassign Access Code Purchase, if the not-working page is the official login page, it may be because the site is temporarily suspended. The only thing you can do is to wait. For other pages, please let us know via email, we will check and give you a reply.
Besides the login link, what else will be given?
Login page is not the only thing we will give. There will be a lot of other relevant information that will also be provided such as login instructions, or pages providing notes during the login process.
What can I do if the login for Webassign Access Code Purchase is not successful?
In case your login for Webassign Access Code Purchase is unsuccessful, you should recheck out your provided personal information again or you can choose another recommendation for Webassign Access Code Purchase at our site.
Source: https://arts.afphila.com/webassign-access-code-purchase
0 Response to "To Continue Using Webassign Verify Payment by Purchasing Access or Entering an Access Code"
Post a Comment